A/B Testing a Static Docusaurus Site
It's common to use static site generators like Jekyll or Docusaurus for marketing or documentation websites. However, it's not always easy to run A/B tests when using these tools.
Prefab makes it simple. In this post we'll show how to setup an A/B test on a statically-generated Docusaurus website. We'll also show you how to send your experiment exposures to an analytics tool. We'll be using Posthog, but the process should be very similar for any analytics tool that has a JS client.
Installing Prefab
This step is the same as for adding Prefab to any other React project.
- npm
- yarn
npm install @prefab-cloud/prefab-cloud-react
yarn add @prefab-cloud/prefab-cloud-react
Initializing Prefab in Docusaurus
We recommend using the PrefabProvider component from our React library. In a normal React application, you would insert this component somewhere near the top level of your app. For a Docusuarus site, the easiest place to add it is in the Root component. That way Prefab will be available for experimentation on any page of your site.
If you haven't already swizzled the Root component, here's a link to the Docusaurus docs for how to do it: https://docusaurus.io/docs/swizzling#wrapper-your-site-with-root
Everything that we're going to do here needs to run client side, so we'll start by adding the Docusaurus useIsBrowser hook to our Root component.
import React from "react";
import useIsBrowser from "@docusaurus/useIsBrowser";

export default function Root({ children }) {
  const isBrowser = useIsBrowser();

  if (isBrowser) {
    // do client stuff
  }

  return <>{children}</>;
}
This is the basic initialization for the Prefab client.
import React from "react";
import useIsBrowser from "@docusaurus/useIsBrowser";
import { PrefabProvider } from "@prefab-cloud/prefab-cloud-react";

export default function Root({ children }) {
  const isBrowser = useIsBrowser();

  if (isBrowser) {
    const onError = (error) => {
      console.log(error);
    };

    return (
      <PrefabProvider apiKey={"YOUR_CLIENT_API_KEY"} onError={onError}>
        {children}
      </PrefabProvider>
    );
  }

  return <>{children}</>;
}
Adding Context for Consistent Bucketing
Often A/B tests are bucketed based on users. To do that, we need some consistent way to identify the user, even if they're not logged in...which is usually the case for a static site. Luckily you can probably get an identifier from whatever analytics tool you have installed, or you can generate one yourself.
const uniqueIdentifier = window.posthog?.get_distinct_id();
Once you have the identifier, you can pass it to the Prefab client as context.
const contextAttributes = {
  user: { key: uniqueIdentifier },
};

<PrefabProvider
  ...
  contextAttributes={contextAttributes}
  ...
>
  {children}
</PrefabProvider>
We have some opinions about why you might want to generate your own unique tracking ID.
Tracking Experiment Exposures
Your experiment is only going to be useful if you have data to analyze. Prefab is designed to work with whatever analysis tool you already have, so you don't have a competing source of truth. To do this we make it easy to forward exposure events to your tool of choice.
Typically you will have initialized your tracking library as part of the Docusaurus config. You can then provide an afterEvaluationCallback wrapper function to the Prefab client. This will be called after each use of isEnabled or get to record the flag evaluation and resulting value. In this example we're using the Posthog analytics platform.
<PrefabProvider
  ...
  afterEvaluationCallback={(key, value) => {
    window.posthog?.capture("Feature Flag Evaluation", {
      key, // this is the feature flag name, e.g. "my-experiment"
      value, // this is the active flag variant, e.g. true, "control", etc.
    });
  }}
  ...
>
  {children}
</PrefabProvider>
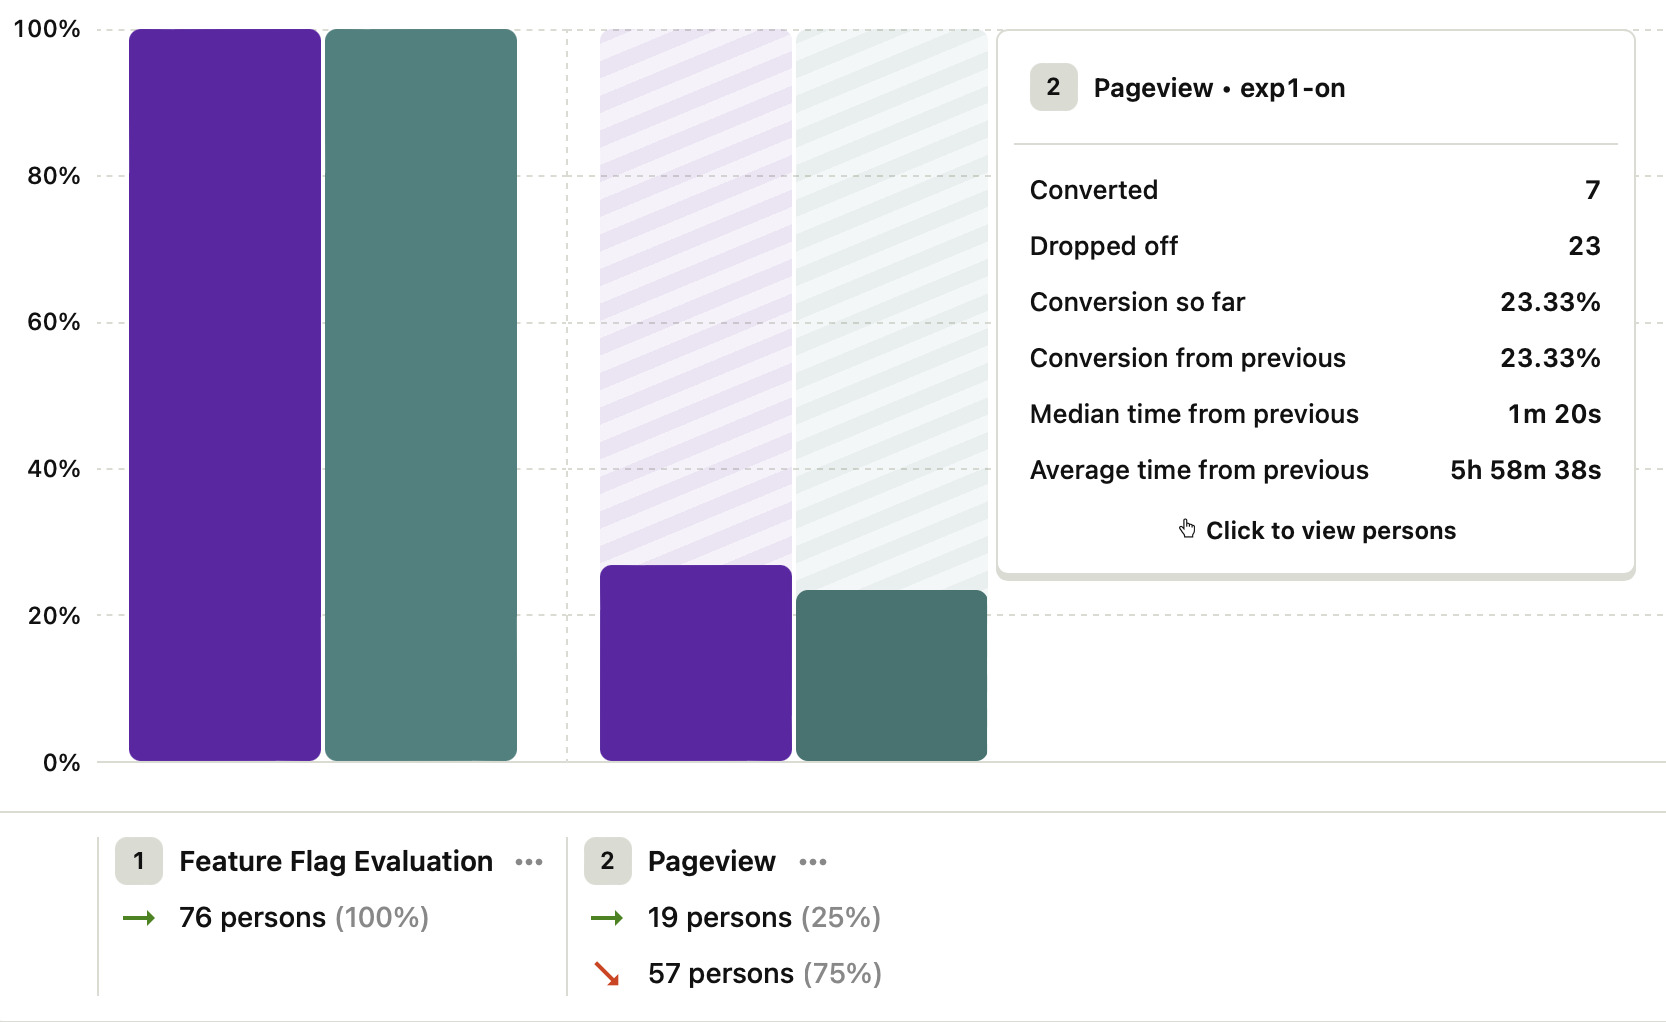
Here's an example chart from Posthog showing an experiment funnel going from experiment exposure to viewing any other page.

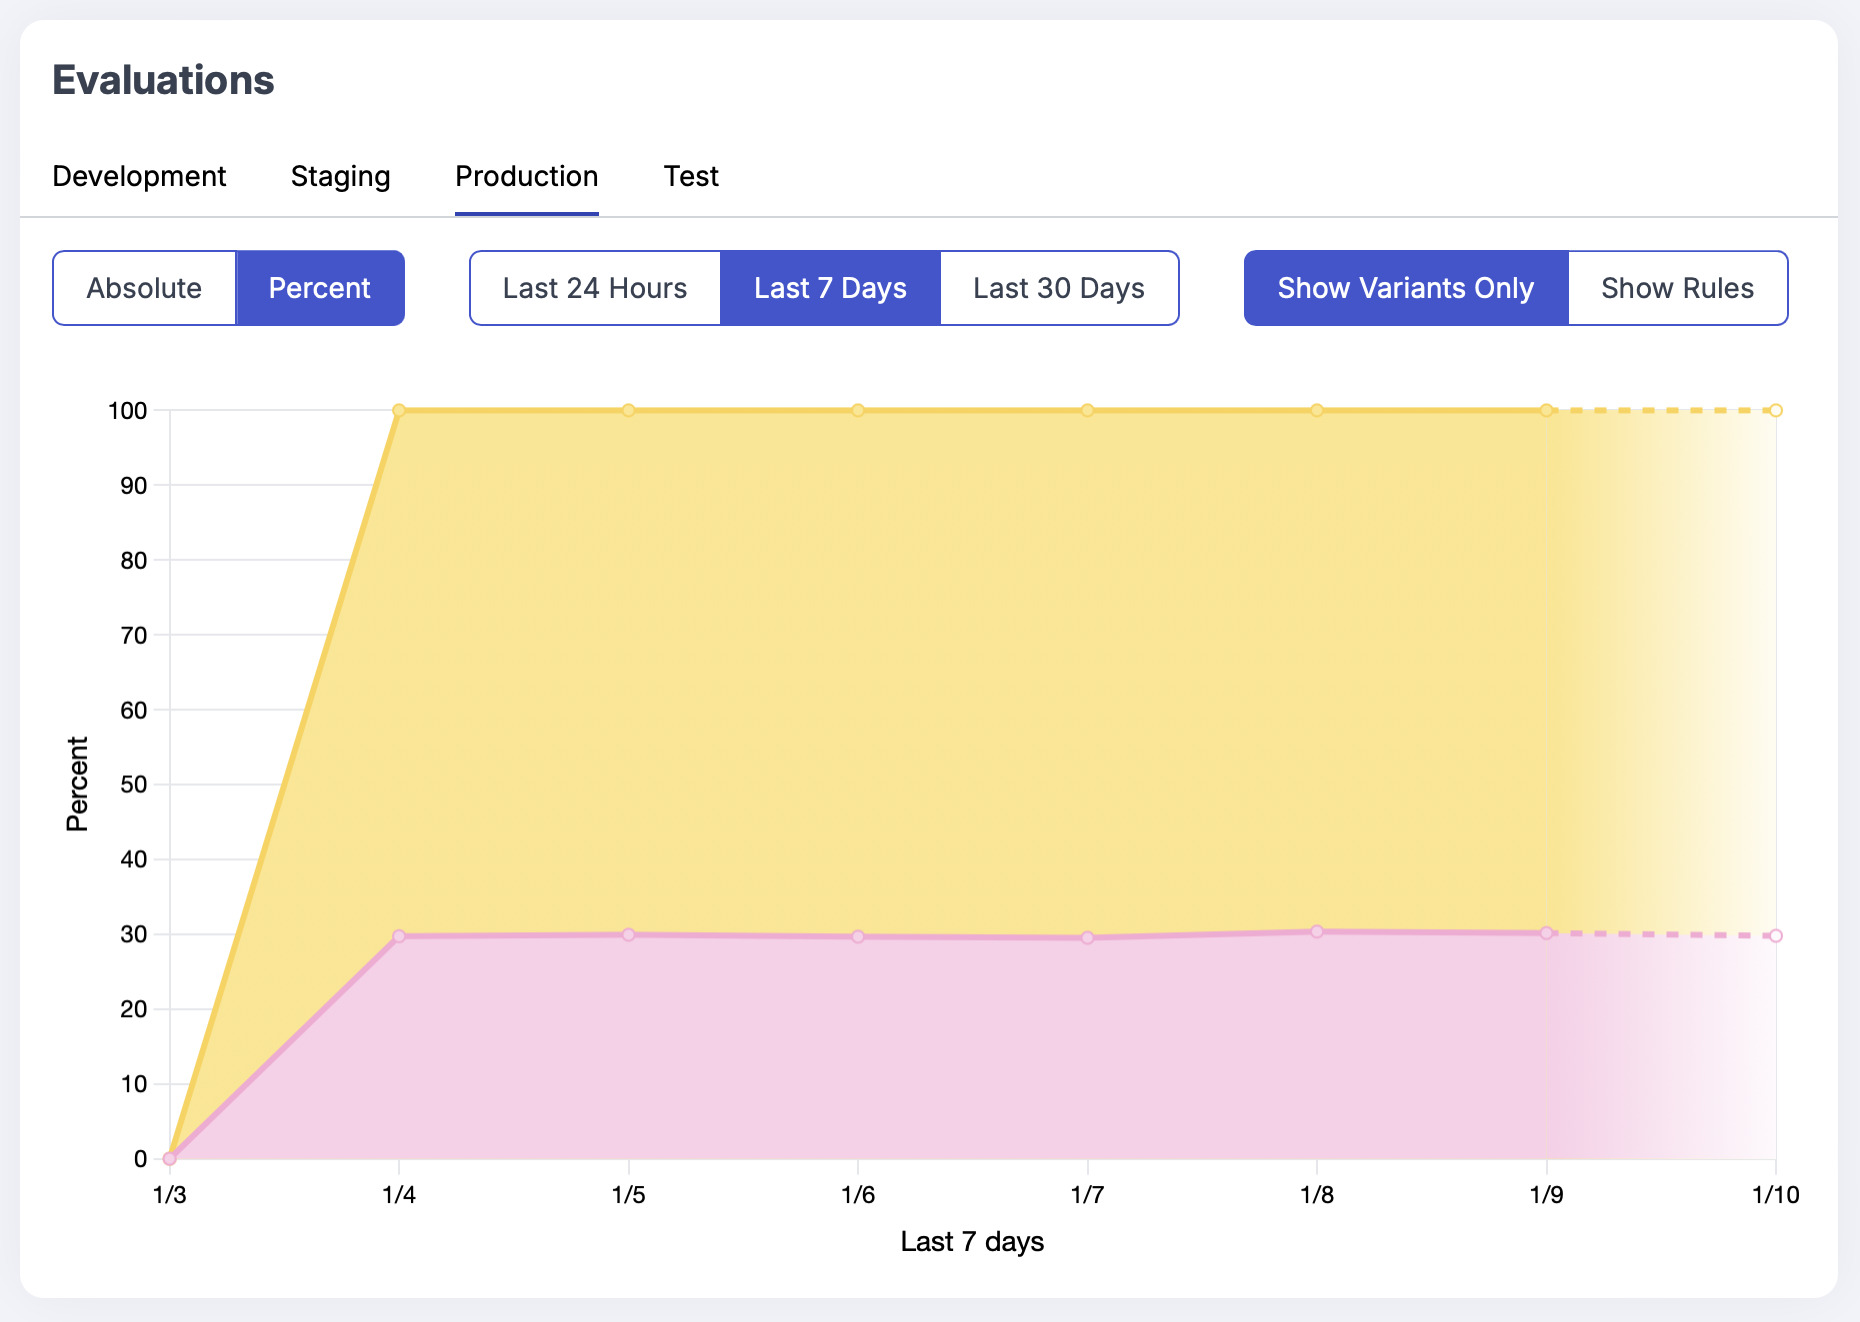
Prefab also provides evaluation charts for each feature flag, which you can find under the Evaluations tab on the flag detail page. This telemetry is opt-in, so you need to pass collectEvaluationSummaries={true} to PrefabProvider if you want the data collected. While these are lossy and not a substite for analysis in your analytics tool of choice, they can be useful for troubleshooting experiment setup. Below is an example of an experiment with a 30/70 split.

Setting up Your Experiment Code
Congrats, now you're ready to use Prefab from any Docusuarus JSX page or component. Import the usePrefab hook and use it to get a value for your experiment.
import React from "react";
import Layout from "@theme/Layout";
import { usePrefab } from "@prefab-cloud/prefab-cloud-react";

export default function Hello() {
  const { isEnabled } = usePrefab();

  return (
    <Layout title="Hello" description="Hello React Page">
      {isEnabled("my-experiment") && (
        <div>
          <p>"Some experimental copy..."</p>
        </div>
      )}
    </Layout>
  );
}
The usePrefab hook also provides a get function for accessing non-boolean feature flags.
Is it Fast?
The Prefab client loads feature flag data via our CDN to ensure minimal impact on your page load speed. It also caches flag data after the initial load. You can read more about the Prefab client architecture in our docs.
Will it Flicker?
There's a catch here, which is not specific to using Prefab. Since Docusaurus is a static site generator, it does not execute any server-side logic when pages are requested. There are more details in the Docusaurus static site generation docs.
This means that the page will first render the static version, which means no access to cookies or to the Prefab flags data. Once your React code runs client-side, it will render again with the correct feature flag values from Prefab.
So in the example above, the page will initially load without your experiment content. Then it will pop-in on the re-render. You'll have to make a judgement call on whether this negatively impacts the user experience, depending on where the experiment is on the page and how it affects the layout of other page elements.
The alternative is to render a loading state on the initial render, then display the actual content once the Prefab client has loaded.
const MyComponent () => {
  const {get, loading} = usePrefab();

  if (loading) {
    return <MySpinnerComponent />
  }

  switch (get("my-experiment")) {
    case "experiment-on":
      return (<div>Render the experiment UI...</div>);
    case "control":
    default:
      return (<div>Render the control UI...</div>);
  }
}
You can read a more in-depth discussion of handling loading states in the Prefab React client docs.
Configuring the Experiment in the Prefab Dashboard
I wrote a detailed walkthrough of creating flags in the Prefab UI in a previous blog post.
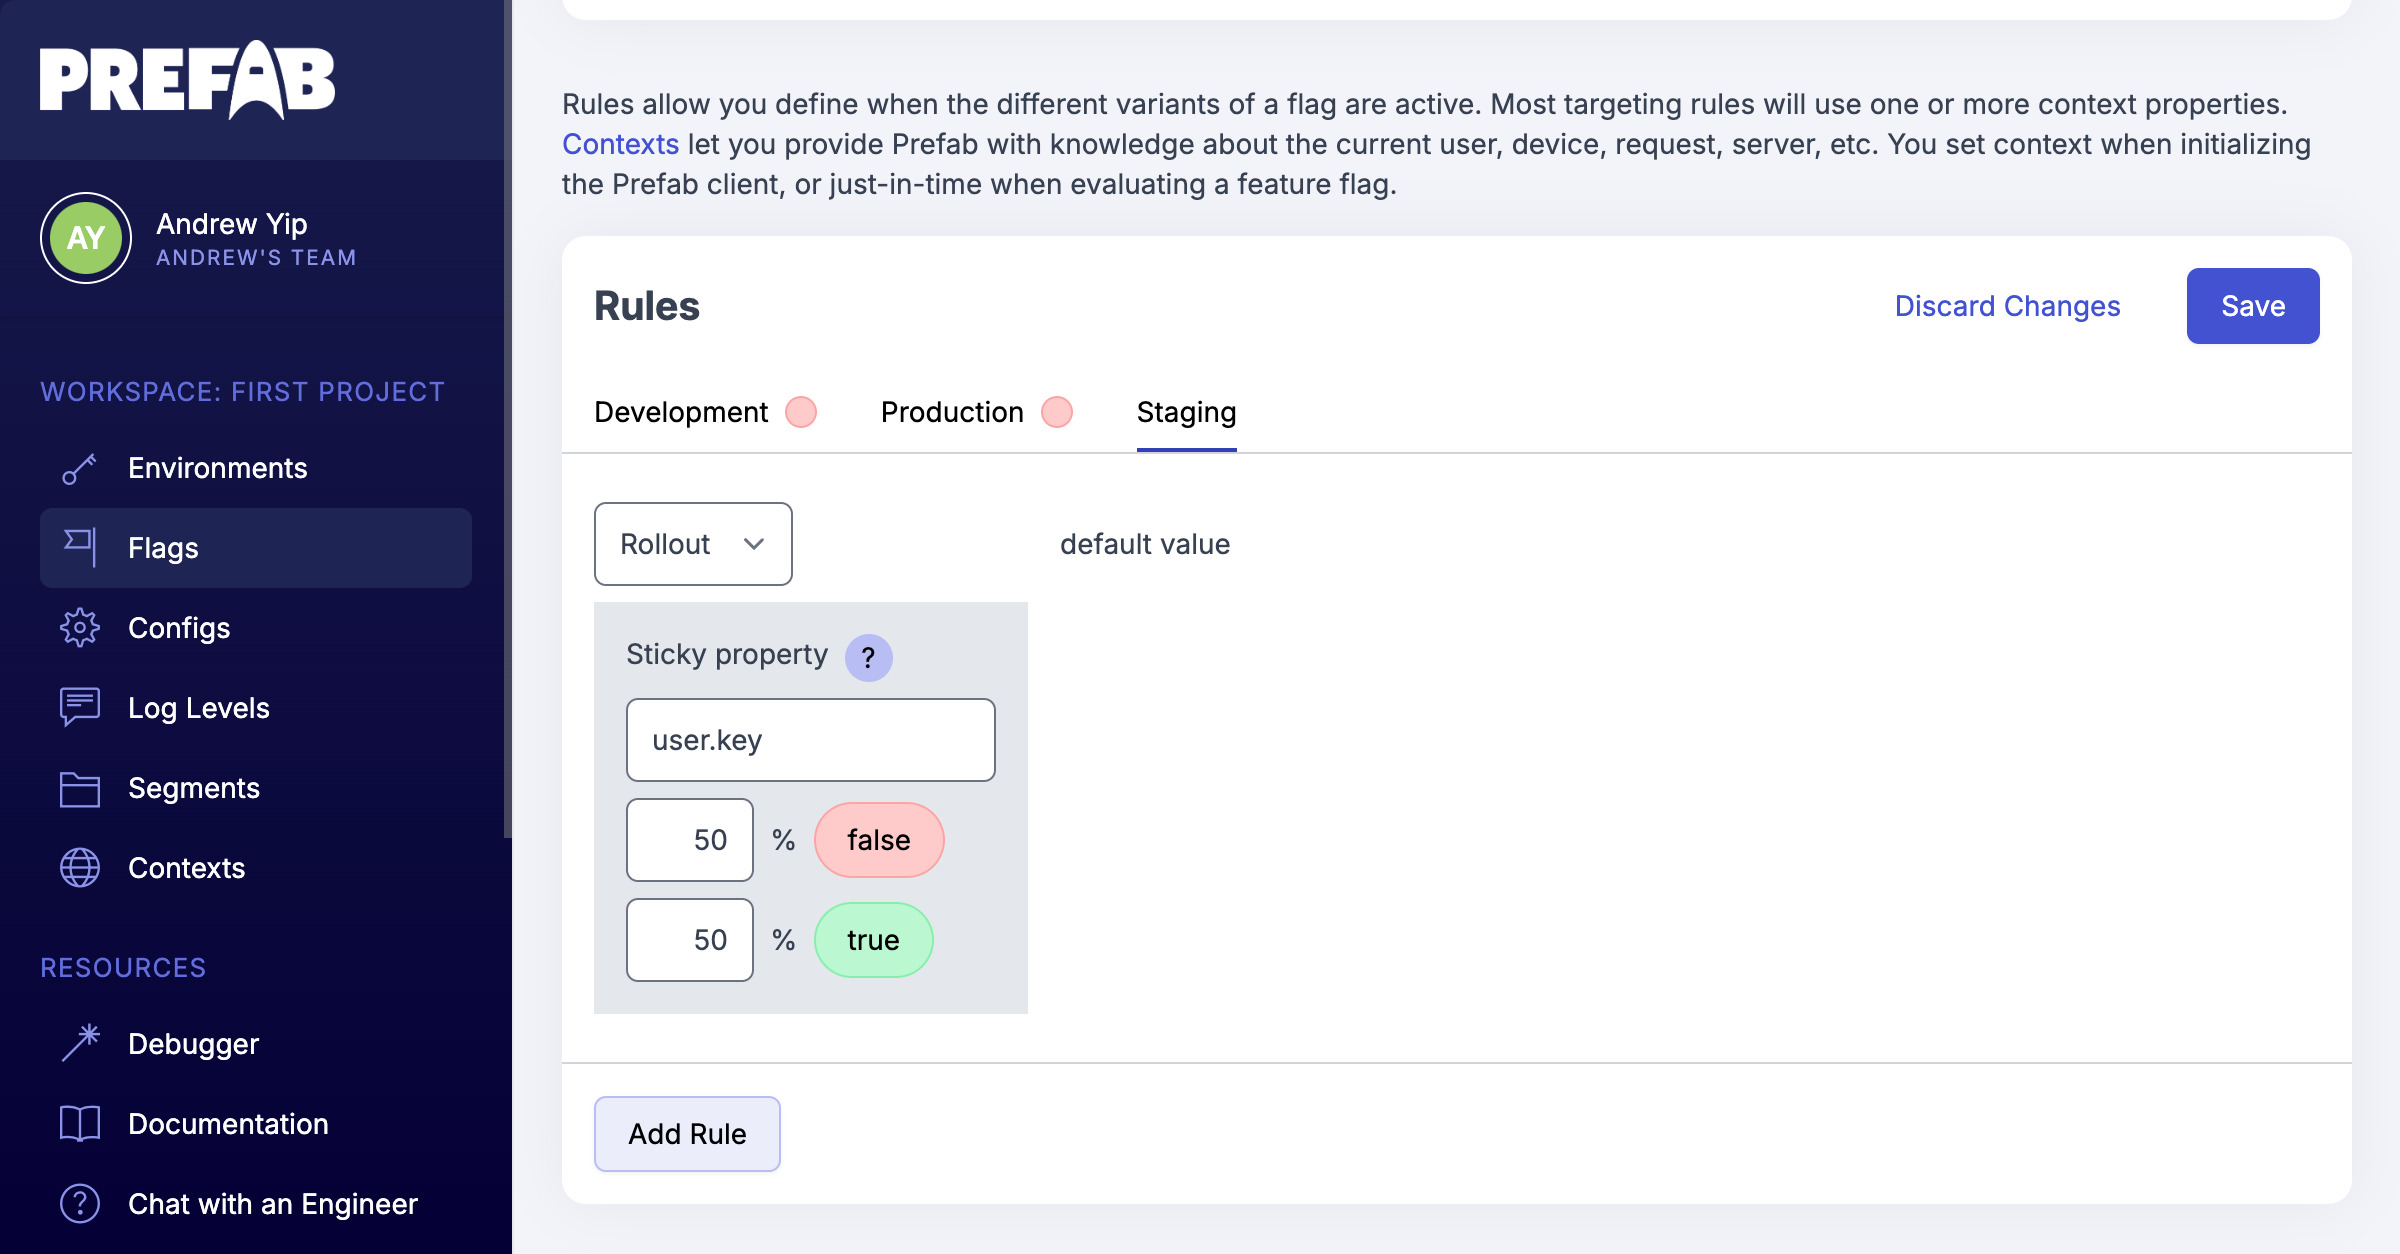
For a simple experiment with only a control and an experiment treatment, you'll want to create a boolean feature flag. The important part for making it an experiment is defining a rollout rule for targeting. Notice that we are setting user.key as the "sticky property". This means that Prefab will use the unique identifier we passed in for segmenting users into the two experiment variants.

